Leaderboard
Popular Content
Showing content with the highest reputation on 10/01/2016 in all areas
-

Daytime Running Lamps (DRL)
operating engineer O/O reacted to 103west43rd for a topic
I added DRL to my 2010 Transit connect. My model did not come with factory DRL. Adding the feature was very simple. The factory wiring is included even if the model does not have the option. All you have to do is add the factory relay to the existing DRL circuit. Here is how...... The factory relay number is 5L3T-AA crossreferenced to 5L3Z-14N089-AA. Cost is about 20 dollars. The relay is installed in the Battery Junction Box (BJB) under the hood, behind the battery. Take off the cover to the BJB. The left side of the BJB contains three 5L3T-AA relays. There is a empty socket for a fourth. Plug in your relay and that's it!1 point -
LED lights for cargo area in 2016 wagon
FocusRush reacted to Don Ridley for a topic
I added some nice LED lights to the cargo area of my SWB 2016 wagon. The lights have an OEM look and provide just enough light to illuminate the cargo area. The lights are mfg by Brand Motion http://www.brandmotion.com/oem-integration/led-lighting/loftlite-led-interior-lighting-kit.html The total lumens from the 4 lights is probably around 90-100. I tapped into the wiring for the side mounted cargo lights. The lights turn on and off with the doors. They dim as the interior lights turn off like the stock incandescent lamps. Each light has a function where separate power can be wired to the light to turn it on by pushing the center of the lamp. Unfortunately this won't work in the TC because the TC dims the lights and turns them off by raising the negative supply to the lamps from 0 volts to +12 volts. So when the lights are off both leads are at +12V. The "push-on" function won't work because when the lamps are off there is no negative supply to the lamp. This is not a problem for me because I would never be in a position to turn the lights on while I am driving. If you wanted them to be reading lights for passengers it would not work. The installation is relatively easy. You have to carefully pull down the headliner just enough to access the back side and cut 4 holes. The insulation on the headliner has to be shaved away so the bezel can snap onto the lamp (use an xacto knife and cut at a 45 deg angle from the bottom of the hole). You will also need to temporarily wedge something between the front lamp housing and the roof so you can push the bezel on. I cut a short piece of PVC pipe and stuck it on a long rod. You remove the wedge once the unit is snapped into place.1 point -
TC Turbocharger
T0ASTERvan reacted to G B L for a topic
I hear you and at some point I will get to drive a 1.6 and get a first hand experience. I wanted a wagon and the Short wheel base Seat configuration was was not acceptable. My choice used a different set of variables. Both outcomes are Valid. I also think that 200 to 240 hp in this van would be a lot of fun.1 point -
TC Turbocharger
T0ASTERvan reacted to DapperVan for a topic
Just throwing in my 2 cents. I shopped TC's for about 3 months before finding the right one. I drove from LA to Vegas to buy it, meaning I had to pay the sales tax in cash back here in CA. Obviously I did a lot of homework before making that decision. To me, there is a minimum amount of torque I'm willing to have in a vehicle. I have sold too many cars because I thought I could live with them being gutless, but realized soon after that I just couldn't (2008 Suzuki SX4, 2013 Subaru Crosstrek XV come to mind) and sold them for a big loss. I wasn't going to make the same bad choice again with the TC. Even though, for the same price, I could get a LWB Titanium trim model with the rear captains chairs, in leather AND rear A/C AND locally...I still chose the stripper model SWB all the way out in Vegas because that's how much better the 1.6 turbo drives over the 2.5. I don't care if Ford only rates it 9 hp more. I'm telling you right now the engines are night and day. Truth be told I'd still like more power, especially at the top end, but I'm waiting for the aftermarket to handle that. I also have a Fiesta ST with the same engine and turbo, yet it has 20 more hp...only because of the ECU tune. As soon as someone makes an ECU tuner for the TC there's another 20 hp. 200 hp in this van will be a lot of fun.1 point -

Retrofit HID projectors into stock headlights
operating engineer O/O reacted to 103west43rd for a topic
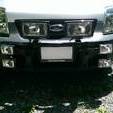
Fifty150, in response to your off-road lighting question, look at my Gallery, my latest (now a few years old) lighting system turns night into day. Six Hella lights, the largest running 100w H3 bulbs.1 point -
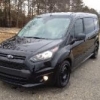
I needed space to haul stuff, so I was caught in the decision to buy a Wagon and strip it down, or a Cargo Van and fix it up. I decided to go with the cargo van. But as cargo vans are designed around commercial use, I decided to special order one the way I wanted it as no dealer carried it on the lot. 95% of cargo vans are white, I wanted black. I also wanted other options that most cargo vans don't come with, like Sync 3 Nav, aluminum wheels, glass in the rear and the sliding doors, tow package, larger mirrors, DRL's, and such. So I "optioned up" the cargo van. I'm working on the rear interior with insulation and paneling, still in the design phase. I also want to add to the audio system, tint the front windows, and other stuff. This van is replacing a 29 year old Toyota truck with 300k miles on it. Just having airbags, Bluetooth and a 4 star safety rating is a huge upgrade. Thanks for listening.1 point
-

UK mirror installed on my US Transit Connect
operating engineer O/O reacted to 103west43rd for a gallery image
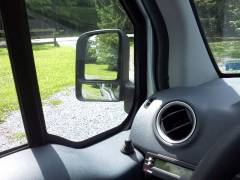
Jim, my pleasure to give you more details. It starts with the fact that all out side mirrors will bend toward the door if hit with some force. They are designed to protect pedestrians. The top larger mirror flat is adjustable, the bottom smaller convex mirror is not.Since I needed to move the mirror angle closer to the door, I first gave it a shove and adjusted it so the view of the bottom convex mirror was where I wanted. There are then two ways to proceed. You can fix the mirror in the new position and loose the safety movement ability (the easy way), or, you can modify the swivel joint between the mirror assembly and the mount on the door (much harder). I first tried the easy way. Look under the joint. You will see a circular cover plate. it has two slots 180 degrees apart. Insert a small flat blade screwdriver to release the plate and pull it down and off. Use the slot that is closest to the door. The joint is held together with three screws. After moving the mirror to its new position, drill two starter holes between any two of the screws and screw in sheet metal screws to lock the joint in place. Snap the cover plate back in place and you are done. Should take 15 minutes. I left the mirror like that for a few weeks, but to lose the safety factor bothered me so I finally went with the hard way. Take the cover plate off and remove the three screws holding the two assemblies together. You will then see that when the mirror assembly swivels it acctually moves up on two small ramps built into the joint on the lower section. Using a Dremel cuting wheel, I cut a small portion of the ramps away, only about an eighth of an inch, this allows the mirror to be re-assembled in the new position perserving the safety ability. Instead of just drilling new holes and using machine screws to put it back together, I noticed the mirror assembly portion of the joint has more than three tapped holes for assembly. I then drilled three new holes in the bottom joint, all an eight inch on center from the existing holes to match up with the new position of the top(mirror) joint. The existing machine screws could now be reused. Take care, and good luck.1 point -

Daytime Running Lamps (DRL)
operating engineer O/O reacted to D.Roberts for a topic
Ahhhh... now I see. Thank you very much for the info. I've been following your posts on your quest for front fog lamps. Those Bulgarian inserts looked interesting, but they're no longer on eBay. But it's nice to know the new switch is available in the States now. Thanks again.1 point -

Daytime Running Lamps (DRL)
operating engineer O/O reacted to ncranchero for a topic
My back-up light relay went FUBAR yesterday so I swapped the DRL relay into it's place until the next PM @ Ford, then warranty. Actually I don't think I'll put the DRL back on, didn't like it as well as I thought I would. I will make them replace that crazy-high relay though!1 point -

Daytime Running Lamps (DRL)
operating engineer O/O reacted to azdamay for a topic
Haha, I would, but it's a company vehicle and they spec'd the option so I better not... just in case. I don't like them always on as the Transit Connect does it, because the van spends a fair amount of time idling and I find it could be a potential source of confusion for other drivers near me, who see the lights and assume I am a "vehicle in play" rather than parked. Not to mention drawing unwanted attention to me when I'm just trying to get some darn paperwork done.1 point -
Daytime Running Lamps (DRL)
operating engineer O/O reacted to rlschow for a topic
Sell your relay to one of these other guys I'm not a fan of DRL either.1 point -

Daytime Running Lamps (DRL)
operating engineer O/O reacted to azdamay for a topic
Mine came with it as an option, so look at it this way: at least you didn't pay $200 or whatever ridiculous price they charged, for a $23 relay. I don't care for it... I like the kind that are only on when the vehicle is in gear. It is annoying to me that the lights are always on as long the van is on.1 point -

Daytime Running Lamps (DRL)
operating engineer O/O reacted to ncranchero for a topic
Awesome info ! ! I'll be making that modification in short order! A little research yields some replacement part numbers if your Ford dealer doesn't have one.1 point
