Fifty150
-
Posts
3,604 -
Joined
-
Last visited
-
Days Won
185
Content Type
Profiles
Forums
Gallery
Everything posted by Fifty150
-

2012 TC trans fluid capacity?
Fifty150 replied to DPL646's topic in Transit Connect Member Custom Builds
If you drain into a paint mix bucket with measurement lines, you will know exactly how much came out. Then when you go to refill, you can refill with the exact amount. You will also note those weird measurements, like 3.2 quarts, and 4.2 quarts. Your fluid will come out of a quart container. If you wan an exact measurement, 0.2 quarts is equal to 6.4 ounces. A trick for that measurement, as learned from Honda guys who are obsessed over exact amount of motor oil, is to use a specimen cup. The cup which the doctor tells you to pee into. It is marked for measurements. You don't even want to know what I had to do, to acquire a pee cup from a doctor's office. But I managed to add one to my tool collection. If you really can't find a good measurement container, "borrow" your girlfriend's bakeware. Clean it out afterwards, and she won't know that she is baking automotive fluid cakes. -
On my one backup camera, which I installed aftermarket, I believe that the view is sufficient. Sorry about the poor quality photography. You can see in the photos that the entire street behind me, with oncoming traffic, is visible. On the right side, you can actually see the corner of the bumper of the car parked next to me. And the mirror part does work, despite the fact that my windows have limo tint. It could be that the camera I bought was "wide angle". It could be the installation location. But it is sufficient for backing out of parking spaces. I don't think that I will need an additional camera in my upper trim piece.
-
You will need an aggressive lift. Trucks are lifted from 6" - 12". So that the wheel well is above the center line of the tire. The entire suspension is re-engineered for the larger wheel and tire. Even the drive shaft is extended. The differentials are regeared. Computer is reprogrammed for proper shifting and speedometer & odometer readings. Not impossible. You could do all the R&D, then recuperate the cost by selling the system you developed. Or get even more creative. Mount a Transit Connect body onto a 4WD Ranger chassis. Replace the motor with a 302. Just day dreaming.
-
I haven't seen it on mine. I could be a lot of things. Post some photos. It may, or may not be rust. If it is rust, your brand new car has a warranty.
-
In The City, those are police bikes.
-
Calculate the new wheel and tire combination that you are thinking of using. Verify fitment with a tape measure. jrm223 is using 215/65R16 on OEM wheels. OEM wheels and OEM tire width, with a higher sidewall, gave a little taller tire with the same scrub radius. His gain in height is minimal, but he is using a tire with a more aggressive tread pattern.
-
Tires are on wheels. Wheels have different widths, offset, and backspacing. Allow those measurements factor in with tire size to effect your driveability. Same offset on a wider wheel means change in backspace. If you are installing an aftermarket wheel, check for the scrub radius. This is what will effect the contact patch of your tire on the pavement. Any good tire shop will be able to measure and do the math so that you don't buy something that doesn't fit and can't turn. Nothing worse than to spend $$$XXX, then your tires rub into the wheel well, the inside of your wheel is hitting suspension components, and you cannot turn steering to full lock. Most shops will not give you a refund. You picked out the wheels and tires. They can't take the merchandise back for restocking.
-
This mechanic was a dealership tech between dealerships. Sometimes the dealerships have good techs. Real advantage is that dealership techs work on one type of car, and get factory training. A good mechanic at a good shop works on a lot of different cars. While he's good in general, he is not working on Ford all the time, and doesn't get the latest training on Ford. Almost like asking a French chef for a burrito. Then you have to deal with dealership pricing, and out of touch service writers trying to upsell and raise their commissions. The upsell really leaves a bad taste. I watched as a service writer gouged $1500 in extra work from an old lady who came in to get new wiper blades. The worst is a dealership with bad techs. Some dealerships do not have good people....... wasn't there a post about a door latch recall, where the forum member found that the dealership did not even do the work?
-
A member just did the same thing. He found his parts in a junkyard. Maybe he has an invoice or something with the part numbers. If you can't find it in a local auto salvage yard, try a larger operation like LKQ.
-
Top 5 Things About Your Transit Connect
Fifty150 replied to OLDSCHOOLFOOL's topic in Lounge Transit Connect
This is the best car I've ever driven when it comes to loading disabled people from their wheelchairs. When the van was brand new, my dad loved riding in the 3rd row, with the second row folded down. It was like being in a limo. Now, it's my niece & nephew's favorite seat. Although it's illegal, sometimes I fold down all the seats, and let them ride in the back so that they could roll around, jump, bump their heads, fall when I hang a turn......just like I did back when I was a kid riding in the back of pickup trucks. Tinted windows. And they now have learned the game of ducking down, when they see a cop. -
Top 5 Things About Your Transit Connect
Fifty150 replied to OLDSCHOOLFOOL's topic in Lounge Transit Connect
I like this van for everything that I can do with it. But here is a part of my daily life which this van is not suited for. Interstate 80. 5 lanes. Traffic flows at 70 - 75 MPH. This onramp has a stop sign. You literally have to go from 0-60, if you don't want to die. Oh yeah, there is about 25 feet for you to do that, and merge into the flow of traffic. -
Very nice DIY install. Not easy to do when you have to improvise parts and mounting brackets. That is one of the most creative and clean installations of aftermarket equipment I've seen on this forum. Looks like it could have been factory installed.
-
The best of my recollection is that I used the power and ground from the reverse lamp, so that the camera activated when shifted into REVERSE. I have a lift gate, so I removed the rear panel and trim piece to install where I wanted. My wiring was similar to yours. Instead of down, I went up. From the rear of the vehicle, I tucked the wire run up into the headliner, and straight to the mirror. My install was on the driver side. One of the photos shows the passenger side, but it's the same idea. Only in reverse. Those are not photos of my van. Just images found online. But you can tell from the photos, how easy it was to push the wire into the headliner. I have trim tools, but I could have done it all with my fingers.
-
That is a very nice looking installation. Clean. How did you install the other camera angle? What does the wiring look like? Did you run wiring into the cabin, or on the outside, under the van?
-
I used the same position for my monitor. I bought the kind that clips onto the rearview mirror, and actually functions as a mirror until I shift into reverse.
-
Often times, driving skill is the equalizer. AWD is not 4WD. People often are not able to differentiate between the 2. Don't you guys who live in a snow climate carry things like shovels? And I am assuming that since the guy lives in a snow zone, he should know a few tricks.
-
That bullet style camera looks like what Doc Hoy mounted on top of his door mirrors. Not a bad idea. I would consider that installation also. Only thing that I would do different is to mount the camera on the bottom side of the mirror. I like the location of the monitors on the dashboard where the A-Pillar is. Very natural to look at the mirror, and see the monitor. Which is why my backup cam monitor is mounted onto the rearview mirror.
-
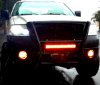
That is an interesting camera. Any trouble with it bouncing around then needing to be aimed again? With the wiring under the door hinge, was that your final installation? Any issues with it running under the hinge that way? I can't really see from the photo; did you use a grommet and silicone to seal the hole for the wire run? I ran my camera wiring through the rubber grommet harness for the taillights. I just made a little cut with a pocket knife, pushed the wire through, then resealed it with silicone. The LED strobe lamp wire goes under the trim panel, under the tail lamp assembly to run along the OEM taillight wires, and down through the bumper, to run over the wheel well and along the body sill trim. Did not drill through the body. But now that I see where you drilled, it looks good. I would consider it if I install anything else.
-
I installed a 12V socket with USB ports in that location. Parts like that are fairly inexpensive from amazon.com. The price today, is even less that what I paid 2 years ago. Roll over image to zoom in Ginsco Cigarette Lighter Socket Splitter 12V Dual USB 2A/1A Charger Power Adapter Outlet for Car Boat Marine Motorcycle Scooter RV DIY Kit (Black) by Ginsco 4.6 out of 5 stars 212 customer reviews | 14 answered questions Price: $10.99 Free Shipping for Prime Members
-
Jack, I had the same project in mind. Only I did not remove the entire console. I got a screw driver, a pair of needle nose pliers, and some cutters. By way of brute force, I ripped the coin tray right out of there. I know that I did not care about the coin tray, and was never going back to reinstall it. I just wanted access to the hole underneath. I simply used the OEM power harness point for the OEM 12V power supply. Then screwed in the face plate with a couple of screws that I had sitting around. If you go the same route, I would suggest using stainless hardware, such as self tapping - self threading screws (which I didn't do). Maybe add a bead of silicone (which I didn't do). The face plate which came with the sockets did not fit correctly over the hole. Surprise! Right? I had a larger face plate made @ TAP Plastics. Fairly inexpensive to have a piece of plastic cut to size, with a couple of holes drilled into it. If you have some plastic, and a drill press, you could do it yourself. I did not have spare, random plastic, textured similar to the van's console. I don't own a drill press. It took about 15 minutes total, to rip out the coin tray, connect the wires, then apply 4 fasteners. You could do it a lot faster, since I took my time drinking a cold one.
-
-
On a 2010, this is very similar to the OEM camera which you can mount on the trim piece above the license plate. Chuanganzhuo Front/Side/Rear View Camera, Universal Normal Image Car Reverse Front/Side/Rear View Bakcup Camera For All Car,Black by Chuanganzhuo 3.8 out of 5 stars 331 customer reviews | 99 answered questions Amazon'sChoicefor "front camera" Price: $15.99 Free Shipping for Prime Members I have a camera like this on my 2016, which you could also use on a 2010. Car Rear View Camera With LED Night Vision 140° Viewing Angle Waterproof by SINOVCLE 5.0 out of 5 stars 1 customer review Price: $10.49 Free Shipping for Prime Members FREE Delivery by Monday if you order within 8 hrs 22 mins. Details My pickup has this camera, which you can install on a 2010. Click image to open expanded view Car Rear View Camera, GerTong License Plate Backup Camera Color HD Waterproof Night Vision 170° Wide Angle Viewing Reverse Camera by GerTong 3.5 out of 5 stars 105 customer reviews | 25 answered questions Amazon'sChoicefor "rear camera for car" Price: $13.99 Free Shipping for Prime Members
-
You used the upper trim, which on Titanium trim level has a reflector? If it's the same location, that is where I installed an LED strobe light. I'd like to see the installation and how you aimed the camera. Another good reason not to use the bumper is that someone will hit it. People tend to tap bumpers when they park. My aftermarket camera is on the trim piece above the license plate. From that location, the aftermarket camera offers a great view. Much better than I expected for a $10 or $20 camera from Amazon. Amazon has a lot of cameras, really low pricing, and free shipping.
-
Yet Another 2011 Connect Conversion
Fifty150 replied to sKiZo's topic in Transit Connect Member Custom Builds
Your food is in the cooler. Your toilet is on top of the cooler. That just sounds like something very bad will happen. -
I'm glad that you bring an informed point of view. It all makes as lot more sense. Big wheel. Small wheel. Equal turning. After all, they're both just as round. That tire size effect on turn radius has been hotly debated for years. Online. In real life. Almost as controversial as motor oil. A lot of people insist that size of the tire has nothing to do with turn radius. Yet, everyone with a lift and bigger tires will tell you that their turn radius circle got bigger. It's just like with motor oil.....you just keep doing what you're doing. Because no matter what anyone else says, when I drive the car, it's a larger turn radius circle and those u-turns aren't possible anymore. We could also touch on whether bigger tires get better mileage.......another hot topic. I was beginning to wonder if it's just perception. Sort of like driving a cab over axle truck. When you are sitting over the front axle, it feels like the truck is making tighter turns and turning on a dime. People also have perceptions of the cabover design being unsafe, since you're right up front with nothing protecting you. Despite the evidence that with conventional trucks, the engine gets pushed through the firewall, and that will kill the driver, not protect the driver.