DonShockley
T.C. Member-
Posts
493 -
Joined
-
Last visited
-
Days Won
51
Content Type
Profiles
Forums
Gallery
Everything posted by DonShockley
-
From the album: 2015 TC LWB Wagon Modifications
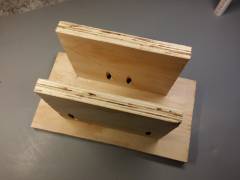
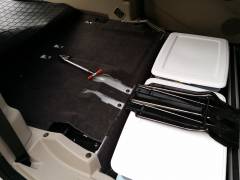
Center support piece fits between bins and provides storage for tow hitch bar. -
From the album: 2015 TC LWB Wagon Modifications
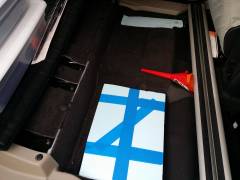
Support to fit under plywood panel for extra strength. -
From the album: 2015 TC LWB Wagon Modifications
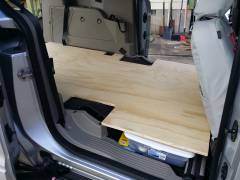
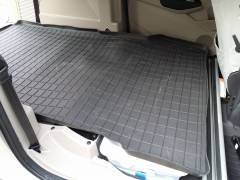
But a lot better cover over the storage bins. -
From the album: 2015 TC LWB Wagon Modifications
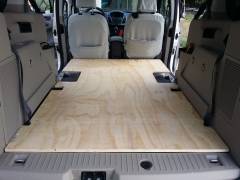
A mostly flat plywood load floor. But somewhat slippery with lots of flex at the front. -
From the album: 2015 TC LWB Wagon Modifications
Removing the center seat mount is a big improvement -
From the album: 2015 TC LWB Wagon Modifications
Foam fillers to make a flatter floor for the storage boxes to sit fairly level. -
From the album: 2015 TC LWB Wagon Modifications
Too many lumps in the floor! Need to work on fixing that. -
From the album: 2015 TC LWB Wagon Modifications
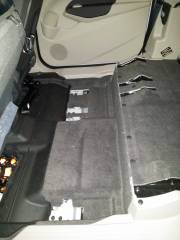
Emergency junk thrown in the hole, but an extra 6" gained over the whole floor area. -
From the album: 2015 TC LWB Wagon Modifications
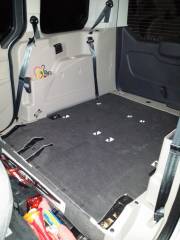
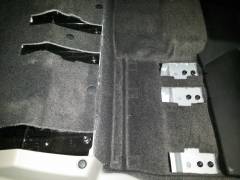
Seat mounts obstruct a flat floor and opening in the carpet need to be dealt with before things disappear down those holes forever. -
From the album: 2015 TC LWB Wagon Modifications
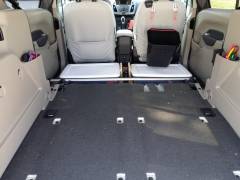
Lots of extra space where the fold flat second row seating used to be -
From the album: 2015 TC LWB Wagon Modifications
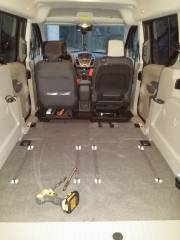
Seats fully removed from 2015 LWB Wagon -
Roof attachment points on 2014 Transit Connect
DonShockley replied to hdrider's topic in 2014 Ford Transit Connect
Here's some closeups of the ends of the Thule rail attachment ends. -
Roof attachment points on 2014 Transit Connect
DonShockley replied to hdrider's topic in 2014 Ford Transit Connect
That's exactly the use I intended for them. They look to be plenty strong enough to support the weight of several sheets pressing down on the rails. Although I don't know as I would trust the T slot in the top of the cross bars with some of the Thule mounts to resist the potential uplift once wind gets under the large flat area with the vehicle at speed. The cammed bar on each leg that hooks under the lip on the inside of the rails is also a potential weak spot in a wind uplift situation. I plan to work out a mounting plan ahead of time and maybe even buy some dedicated straps just for the purpose. I've had a couple ideas floating in my head but I think I'm going to have to do a miniature mockup to work it out. And one of the goals is going to maybe use some foam to seal the gap under the plywood at the front to keep air out, although there would still be air at the sides I think the front would be the source of most of the lifting force. The other precaution I intend to take is to try to anchor the front strapping down to the seat mounting plates on the inside. Those appear the strongest points to resist any uplift. I noticed in your post in the thread about the rear seats that you mentioned being in construction work. I got the rails because I only have occasional need of them so the ability to leave them off when not needed was a big advantage of the Thule cross bars. But it you are going to have them installed continuously with frequent use, you could probable build a stronger and cheaper set of cross bars better suited for carrying sheet goods yourself. Although there is slight bit of contour on the outer edge of the rails, all the real attachment is done with a simple bar pulled up tight against the underside of the lip that is on the inside of the rails. There is a somewhat complicated setup on the Thule feet to allow that to be done from the ends of the rails. But if you were to do a permanent mount, a simple square edged plate with the appropriated standoff and a through bolt for attachment would work. Here's a quick drawing I did as an example of a cheap strong way to mount a DIY crossbar that should work: -
Roof attachment points on 2014 Transit Connect
DonShockley replied to hdrider's topic in 2014 Ford Transit Connect
This is the set I got for my 2015 wagon. In my case it was part of the purchase deal and the local dealer ordered it. But there are some dealers that offer online sales. http://accessories.ford.com/exterior/racks-carriers/kit-lugg-crossbar-univ-lockable.html -
Remove rear seats from the wagon
DonShockley replied to connectkid's topic in 2014 Ford Transit Connect
It was 1/4" rubber mat sold by the foot at Tractor Supply. http://www.tractorsupply.com/tsc/product/rb-rubber-multi-mat-rolled-rubber-1-4-in-thick-sold-by-the-foot?cm_vc=-10005 They also have 3/8" if you need more wear or more strength if you go over the carpet instead of over plywood like I did. http://www.tractorsupply.com/tsc/product/rb-rubber-multi-mat-rolled-rubber-3-8-in-thick-sold-by-the-foot?cm_vc=-10005 However, you should know that the thickness you see at the rear of the earlier photo is actually 3 layers of the 1/4" glued together. I stopped the plywood short of the plastic trim at the rear so that the wood wouldn't damage the trim. But this left a 6 inch gap at the rear. When I added the mat, I ran the main piece long past the end of the wood and used 2 more layers underneath to fill the gap. I can just flip it up to access the spare tire lowering mechanism. -
Remove rear seats from the wagon
DonShockley replied to connectkid's topic in 2014 Ford Transit Connect
Mine were bought from GT covers because that website had better photos and offered sample swatches. But my understanding from other people's comments online is that they are the same company as Precision Covers. -
Remove rear seats from the wagon
DonShockley replied to connectkid's topic in 2014 Ford Transit Connect
That's exactly what happened to me. I was planning on custom ordering a van with the special features I wanted, like the LWB and rear liftgate since all the vans had cargo doors and most were SWB. But the wagon had most of what I wanted plus the extra insulation for the Texas heat and had some great incentives at the time. Here's what the wagon looks like with seats removed and flat plywood floor with rubber mat installed. -
Remove rear seats from the wagon
DonShockley replied to connectkid's topic in 2014 Ford Transit Connect
When I was researching my 2015 TC purchase I saw mention of removable seats in the online manual. After I ended up buying a LWB wagon, I was surprised when I saw no way to just pop out the seats. It turns out only the short wheel base 5 passenger version has the removable 2nd row seats. However, I decided to remove the seats in my wagon anyway to install the seat covers. Each seat is held in with four T50 bolts and only takes a few minutes to remove. The 3rd row seats have the bolts at each corner of the seat frame and you do need to slide the seat forward and back to access each set of two. The second row seats have pairs of bolts at the front end of each seat rail. These are easy to access with the seat unfolded. Once the bolts are removed it does take a little lifting and wiggling to break the seats loose because there are also locating posts on the bottom of the rails that fit into holes in the floor. But once these are popped out, the seats just lift out. With just myself, the wider part of the 2nd row was a bit heavy but the others were no problem. It is easier to lift out the 2nd row if you fold them flat after unbolting. In the end, I liked the extra space available with the seats out so decided to leave it that way since I rarely have more than one passenger. I've been slowly working on modifications over the last couple weeks making a flat load floor for the area and using the extra space for storage. I probably need to do a write up with photos to share the info. -
Tow Hitch Lighting hook up
DonShockley replied to cabmeister's topic in Cargo, Hauling, Towing & Upfit Packages
The Ford kit I got for my 2015 TC Wagon instructed you to make the connection, via a 15A inline fuse holder, at the bottom of F1 on the high current junction box mounted to the front of the battery box. My purchase deal included the dealer install of the accessory tow kit so I didn't have to do the work. That being said, I don't really understand why they do it that way unless it's just for universal application. The cargo area fuse block is right next to where they mount the tow wiring adapter and it already has the unused connection at F26 ready for the factory tow wiring. Granted the other side of the circuit isn't wired if you don't order the factory tow package, but it's a simple spade connection to tap the power for a fuse holder in this area. That's what I did to get power when I added my own accessory fuse box. Pix are in the thread I posted: http://fordtransitconnectforum.com/topic/3912-added-my-own-accessory-fuse-box/ Here's a picture pointing out the F1 connection where my Ford kit gets it's power. -
My 2015 TC wagon had a setting that enhanced the balance for the driver only. It made a noticeable difference.
-
Engine compartment battery access
DonShockley replied to jfuhrma1's topic in 2014 Ford Transit Connect
I just came across this video that shows the entire process It's for a Focus, but the Transit Connect is based on the Focus and appears identical. -
130west43rd: Thanks for the complimentary feedback. When I post stuff like that I never know if I'm actually helping others or just exercising my borderline OCD tendencies.
-
It's not really that hard to add a dedicated set of USB ports for charging wherever you need them. I already had the Sync/USB but wanted USB power elsewhere. Take a look at these two threads I did showing how I modified my 2015 TC Wagon to add extra circuits for accessories. Getting power from cargo area fuse box: http://fordtransitconnectforum.com/topic/3912-added-my-own-accessory-fuse-box/ Adding USB to overhead shelf: http://fordtransitconnectforum.com/topic/3936-added-usb-power-to-overhead-shelf/ If your 2014 is similarly configured, which in theory it should since they are both Gen2, it should be fairly simple with only basic hand and wiring tools needed. If it looks like something you want to tackle and need some of the small wiring parts I used, let me know. As I mentioned in those posts, there were minimum order quantities on what I bought so I have extras. Or if you aren't good at DIY and you are confident that something like what I did would fit your vehicle, I can prebuild you a long wire set for simple plug in at the cargo fuse box. Then you just have to route the wires, install a USB port where you need it, and connect the wires at that end.
-
I don't think you're going to be able to get the factory options installed later by the dealer. When I inquired about adding a single extra circuit like the Upfitter Wiring Harness option in my TC Wagon it turned out it was not possible. Apparently the way they build them is contrary to common sense. You would think big things like the main wiring harnesses and fuse boxes would all be fairly standard and the appropriate options are just added as needed. But I was told, and my checks of the fuse box and such confirms, that it wasn't possible to add the option later because they don't install any of the supporting hardware if the option isn't included from the factory. They don't even wire both sides of the fuse location in the fuse box if that option isn't ordered. For example, there is a factory installed tow option. But when I wanted to add it to my vehicle after purchase, it wasn't as simple as getting the factory tow control box and plugging it in. They had to install a different tow controller that required wires to be spliced into the tail light wiring and extra power wires had to be run all the way to the battery. Trying to add sensor warning system would likely be even harder since it interfaces with the sound system, the ABS system, and the image control system for the camera. Even if possible, it's likely to cost a whole lot more than the factory add on cost for that option. You're likely going to need an aftermarket solution. Based on my experience, I wouldn't put too much stock in the dealer expertise. I had the same attitude when adding items during my recent purchase but now I would just go with DIY or a specialist shop for aftermarket items. Even though my dealer's "trailer wiring specialist" did the work, the wiring job was horrendous. Wires pulled tight across sharp metal edges and 12" of wire cut off the end of the power wire supplied by Ford. If the original length had been left intact and routed better there would have been no risk of wire damage. Other wires added were spliced together unnecessarily so that a wire was red at one end and black at the other end. Too much possibility of confusion. I replaced the dealer spliced wire where possible and added protective wire loom to as much of the rest as possible. I no longer think that the supposed expertise of the dealer service staff and familiarity with the specific vehicle ensures a better job.
-
Visibility is the main reason the liftgate was a must have option for me when I was looking for my new Transit Connect. At first I wasn't sure how big a difference it would make since I was only seeing vans with doors around town. But as soon as I saw a wagon with the liftgate a few cars ahead of me at a traffic light, that big clear expanse of glass had me sold. Most of my daily access to the rear is via the drivers side slider, so the bit of extra effort for the lift gate isn't much of a hassle.
