DonShockley
T.C. Member-
Posts
493 -
Joined
-
Last visited
-
Days Won
51
Content Type
Profiles
Forums
Gallery
Everything posted by DonShockley
-
Where is the fuse for the cigarette lighter?
DonShockley replied to pippalainsbury's topic in Interior
I have a US 2015 LWB Wagon and the fuses for all the cigarette lighter power points are in the engine compartment fuse block. They are the 20A blue square ones (JCase). The purpose/location varies depending on the model and options. Per my manual they are as follows: F11 - Rear Floor Console or Cargo Area F15 - Cargo Area or Luggage Compartment F17 - Floor Console Here's a couple photos. The first is my engine compartment fuse box showing the blue 20A fuses mention earlier. The second is the appropriate page from the 2015 wiring diagram book I bought that may help you or your mechanic. -
A couple of phone mounts I am trying
DonShockley replied to DarbukaDave's topic in Accessories and Modifications
I love the RAM mounts! I initially got the same no-drill seat mount for my last vehicle. https://www.rammount.com/part/RAM-316-1AUAnd once I got my TC and moved the mount over found the rod to be too short so also bought a longer one. In the end, since I am planning to keep my TC until it's worn out, I decided to use some RAM parts and some DIY parts to make a custom mount that's more permanent. I remounted the old long riser to a new bulkhead mount attached to the platform I added. I still have the original no-drill mount in case I find another spot I need a mount. I also used RAM parts to make a magnetic mount for my 12v spotlight for easier use in the event of a night tire change being needed. I keep an assortment of extra mounting balls and arms around for whatever comes up unexpectedly. I even used RAM parts to mount a mirror above my computer to be able to see parking area and the walkway to the front door while I am surfing in the den. Much cheaper than a security camera. Coupling the RAM parts with photo tripods and mounts lets you do almost anything that needs mounting and positioning. I just wish RAM offered an assortment of smaller ball sizes so you could fit other existing mounts, like the one on my dash cam, to the RAM ball system. I got lucky with my Tylt wireless charger and was able to use a RAM-to-Garmin ball adapter. -
Tweeter speaker panel, and speaker sizes..
DonShockley replied to mcfiddles's topic in 2014 Ford Transit Connect
I'm not an audio guy, so I have no expertise in stereo hookups. But I did notice that I happened to catch the A pillar tweeter (at least I think that's what it is) in one of the photos I did when I added USB power ports to the overhead shelf in my 2015 LWB Wagon. Your 2014 should be similar since they are both Gen2 models. http://fordtransitconnectforum.com/gallery/image/895-overhead-usb-power-3/ I went back to the original full resolution photo I have on my computer. It looks like the tweeter just has a couple of those sprung plastic clip arms holding it in. It's that narrow separate piece right in the center of the tweeter housing. I also have the 2015 wiring diagrams. Here's some photos of the two pages I found referencing the rear speakers. Hope this helps some. -
Converted 2015 LWB Wagon into a Van
DonShockley replied to DonShockley's topic in Accessories and Modifications
Yes. Each seat is held in by four bolts (T50 needed to remove). The third row seats have them at each corner and you need to slide the seat all the way forward to remove the rear two, then slide the seat back to access the front two. The second row seats have four each also, but in pairs of two at the front. And each seat also has locating pins on the base so you have to give it a little wiggle and lift straight up after you remove the bolts to break it loose. The second row seats are easiest to remove when folded and the third row seats while unfolded. -
Converted 2015 LWB Wagon into a Van
DonShockley replied to DonShockley's topic in Accessories and Modifications
Here's a couple extras! The first is a drawing with all the measurements for the single piece plywood deck I built. And these measurements were corrected to fix the errors I described earlier. Naturally these were for my vehicle so there's no guarantee they'll match yours if you want to try this build. But it should be close if you have a LWB Wagon. The second is a quick diagram and explanation I had for some alternate ways of doing the job that occurred to me during the build. My initial thought was for a smooth, strong and flat floor from a single continuous sheet. But you can get a bit more coverage, 57" wide at the doors instead of 48" wide, if you are willing to have a cut joint in the middle of your floor. It was also starting to become a pain every time I had to install and remove the single panel for the numerous trials and modifications. A narrower folding floor, 26" wide when folded with hinges, can be made in 3 pieces to make frequent installation and removal much easier. Unfortunately, it will also require a second (half) sheet of plywood. I tried and just couldn't seem to get all 3 pieces to pattern onto a single 4x8 sheet if you want the full 57" width at the doors. They are in PDF format for most universal viewing. That's part of the reason for the delay in posting this thread. It took a week to try to learn the DraftSight program well enough to produce a useful drawing. Transit Connect Floor Alternate Ideas.pdf Transit Connect Floor Dimensioned.pdf But if you want the CAD drawings I generated for these, PM me an email address to send them to. I tried to upload the .dwg files but the forum wouldn't allow it. Update: Found an error in the files orignally posted. Fixed the error and posted new corrected files. -
Converted 2015 LWB Wagon into a Van
DonShockley replied to DonShockley's topic in Accessories and Modifications
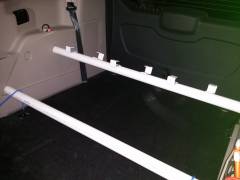
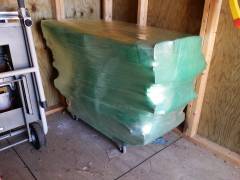
And what happened to the seats I removed since I decided not to reinstall them after adding the seat covers? Why, they got mummified of course! To be resurrected when I trade in the vehicle in 7-10 years. And unless something better comes along in that time, the next one will be another Transit Connect. I was also able to eliminate the need for the foam fillers under the stowage boxes by finding some of my normal carry items that filled the gaps. I also added a couple homemade cargo bars using 1 ½ PVC piping. One to stop objects sliding back and forth, although it was mostly needed with just the plywood floor. The rubber mat stops the sliding. The other is just to keep grocery bags upright. Not tested yet but a quickie build using leftovers on hand. -
Converted 2015 LWB Wagon into a Van
DonShockley replied to DonShockley's topic in Accessories and Modifications
I had been hoping to reuse the WeatherTech mat with the new lower floor. But the custom fit was too wide for the narrower area where the seats had been mounted. The extra bends and crimps would have been marginally usable, but looked bad to boot so I made my own mat. My local Tractor Supply store had (horse stall?) rubber matting available by the foot. http://www.tractorsupply.com/tsc/product/rb-rubber-multi-mat-rolled-rubber-1-4-in-thick-sold-by-the-foot And here I had some good luck. The remaining piece on the roll was just about an extra foot longer than my plywood. So rather than cut it exact, I just bought what was left. When test fitting prior to cutting, I liked how it overlapped the plastic trim panel left uncovered earlier. So I used the extra length to cut 2 extra layers and glued them together to let the mat sit flat over the trim area also. Now the rubber mat covers from seat back to lift gate. I did need to do a bit of cut out for the lift gate latch. And another one at the front for the console power point. -
Converted 2015 LWB Wagon into a Van
DonShockley replied to DonShockley's topic in Accessories and Modifications
A few mistakes were made along the way. Initially I made the openings around the seat mounts too large. The front of the flat floor dropped off slightly before making the large drop. My initial cut was meant to clear the entire mount but the slight drop allowed an extra 2 ½ inches of overlap at the front. I corrected this with more plywood and truss build plates. And my clearance around the middle mounting points was ¼ inch too small to clear the plastic trim around it, so I enlarged it when rounding the panel edges by making a couple extra passes with the router. And I also decided to bolt down the panel, mostly in case of a crash, and the 70mm bolts were a bit too long. But there was enough clear area under the floor to fully tighten them. The proper size would have been M10-1.50 x 60mm. -
Converted 2015 LWB Wagon into a Van
DonShockley replied to DonShockley's topic in Accessories and Modifications
But the long length of plywood over the bins still had a lot of flex. Since the floor was raised in the middle between the bins, this was a good spot to add support. I was able to use the scrap cutouts from the seat mount area to make the support with a flat base to minimize the carpet compression and dual sides to allow storage of my trailer hitch bar in the middle. This helped a lot, but the front corners still flexed too much under even moderate load. But a 2x4 stiffener along the front edge and some additional legs at the corners took care of that. The legs had to be just outside the 4 ft width of the plywood in order to land on the nice flat area of the floor underneath the B pillars. -
Converted 2015 LWB Wagon into a Van
DonShockley replied to DonShockley's topic in Accessories and Modifications
My initial thought was to use even more foam to lift the deck surface above all the obstructions to get a nice flat plywood deck. But the rise of the seat mounts would have meant raising the floor 2 ½ inches, almost half the extra space gained by removing the seats. But I could get a mostly flat floor by removing the center seat mount (T50 bolts). I decided to leave the side mounts since the obstruction was minimal, the door sill trim was attached to them, and they would provide a nice strong mounting point for securing cargo. That way a single sheet of plywood would provide the smooth load floor that was my goal and only cost ¾ inch of space. This gave strength to the top of the bins and allows them to be removed from the side. I also chose not to cover the plastic trim at the rear of the floor to minimize risk of damaging it under heavy loads and maintain access to the spare tire lowering winch. -
Converted 2015 LWB Wagon into a Van
DonShockley replied to DonShockley's topic in Accessories and Modifications
The first attempt was to simply fill the main seat recess with the emergency gear and other junk I tend to carry at all times and just use the WeatherTech mat (designed to cover the fold flat set decking) as a cover. But this proved to be too uneven and unstable for my needs. Locating properly sized bins and stowing the gear in them provided a lot of improvement. But any heavy use was off limits and the floor was still uneven. Also a lot of wasted space, filled with hard foam sheets, under the bins themselves. -
Converted 2015 LWB Wagon into a Van
DonShockley replied to DonShockley's topic in Accessories and Modifications
The first step was done even before I made the decision to leave the seats out permanently. Initially I only removed the seats (T50 bolts) to install the seat covers. And I really liked how much additional space it provided. Although it was not as usable as the stock flat deck, due to the seat mountings and other odd shapes, there was a significant increase in storage area. How to make use of it all would be a challenge. There were also the openings in the carpeting from the seat mounts that would have to be dealt with. -
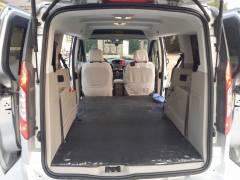
I decided to convert my 2015 TC LWB Wagon into a Van. I got the Wagon because of the incentives, the 6 month or more delay on a custom Van order, and the Wagon had most of the features I wanted to customize a Van with. But my lifestyle rarely involves a single passenger, and never a need for 7, so the seats were more of a hindrance than a benefit. Although the flat deck provided with both rows folded is the best implementation of cargo duty in a passenger vehicle I’ve seen, I wanted more space and storage. So I set about a slow conversion process, trying things for a few days until the next improvement necessary became apparent. I’ve waited until the process seemed to be pretty final before writing this up to share. I’ll try to hit the highlights in the photos and descriptions below. But here’s the final result.
-
From the album: 2015 TC LWB Wagon Modifications
Roof rail crossbars and other junk fills in all the little nooks and crannies -
From the album: 2015 TC LWB Wagon Modifications
Cheap DIY cargo bars, one set with hooks for grocery bags. -
From the album: 2015 TC LWB Wagon Modifications
Mummified 2nd and 3rd row seats. To be resurrected in the distant future when I trade in for a new Transit Connect. -
From the album: 2015 TC LWB Wagon Modifications
What once was a 2015 TC LWB Wagon with 3 row seating is now a cargo van with a nicely trimmed out interior and lots of cargo space -
From the album: 2015 TC LWB Wagon Modifications
.... and the back of the mat reaches all the way to the liftgate. -
From the album: 2015 TC LWB Wagon Modifications
Recessed cutout to allow easy access to power point on the rear of the center armrest -
From the album: 2015 TC LWB Wagon Modifications
Front of mat goes all the way up to the seats ..... -
From the album: 2015 TC LWB Wagon Modifications
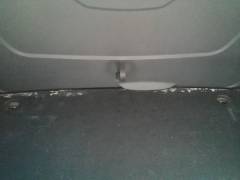
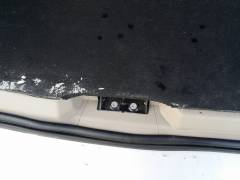
Rubber mat, 3 layers of 1/4" thickness glued together, over plastic trim with cutout for liftgate latch -
From the album: 2015 TC LWB Wagon Modifications
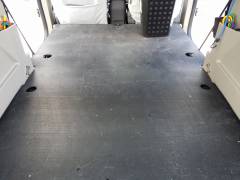
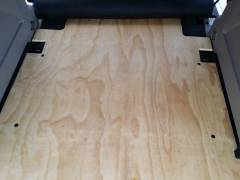
Flat plywood floor bolted down to seat mounting holes with too long 70mm bolts. Correct bolt size should have been M10-1.50 x 60mm. -
From the album: 2015 TC LWB Wagon Modifications
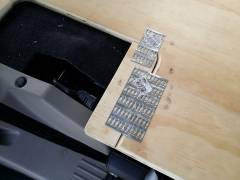
Overly large cutout fixed using truss building plates to add wood filler pieces -
From the album: 2015 TC LWB Wagon Modifications
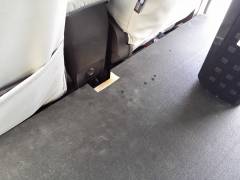
Opening around seat mounts initially cut 2 1/2" too large due to sloping front of mount -
From the album: 2015 TC LWB Wagon Modifications
A stiffener across the front and legs at the corners finally solves the stability issues.


