Torton
T.C. Member-
Posts
28 -
Joined
-
Last visited
-
Days Won
3
Torton last won the day on September 19 2020
Torton had the most liked content!
About Torton

Profile Information
-
Region
U.S. Northeast
Recent Profile Visitors
The recent visitors block is disabled and is not being shown to other users.
-
 Bean reacted to a post in a topic:
Micro Camper Conversion 2015 LWB XL
-
 Bean reacted to a post in a topic:
Micro Camper Conversion 2015 LWB XL
-
 Bean reacted to a post in a topic:
Micro Camper Conversion 2015 LWB XL
-
 Bean reacted to a post in a topic:
Micro Camper Conversion 2015 LWB XL
-
 KevinRollin reacted to a post in a topic:
Micro Camper Conversion 2015 LWB XL
-
 KevinRollin reacted to a post in a topic:
Micro Camper Conversion 2015 LWB XL
-
 windguy reacted to a post in a topic:
Micro Camper Conversion 2015 LWB XL
-
Hey Chong, First off, nice build! The full back being a platform makes a lot of sense to me. Tons of storage! What hitch do you have on the van? Did you install it yourself?
- 121 replies
-
- bike
- conversion
-
(and 3 more)
Tagged with:
-
Micro Camper Conversion 2015 LWB XL
Torton replied to Torton's topic in Accessories and Modifications
Hey Thanks! I swear I had taken a photo of the bikes in the back, but I can't seem to find it. I'll take one next time we're out. It's a tight fit with the wheels still on (650b and 29er), but it works. So, the rack I'm using is actually a ladder rack from Vantech that mounts in the rack channel via bolts directly through the roof. You might be able to just get the feet and mount your bars to them. I'll be getting a ski-box soon to give us a little additional storage for longer trips. Sorry about the delay! I'm just returning from a long trip in the van. -
 Chirola reacted to a post in a topic:
Micro Camper Conversion 2015 LWB XL
-
 rmcinak reacted to a post in a topic:
Micro Camper Conversion 2015 LWB XL
-
Micro Camper Conversion 2015 LWB XL
Torton replied to Torton's topic in Accessories and Modifications
Yea, I'm generally not a sticker person, especially for cars, but my wife felt like they made the van look less creepy when sitting in our neighborhood. The plan is to get one sticker per state or major attraction we visit in the van. Right now, much of what is on there are magnets that I'll probably take off. Let me know what the next trip is! -
Micro Camper Conversion 2015 LWB XL
Torton replied to Torton's topic in Accessories and Modifications
Phase 4: Windows, Insulation, and Vent Fan: The day I cut huge holes in my brand new car. So, this album brings you up to date on where I'm at as of last night. I spend almost the entire weekend installing 3 windows, a Fantastic Fan, and insulating body panels. We've got a trip coming up in October, so the goal was to make it a little more "livable" for the trip. Without windows in the back of the van, it got pretty stuffy in there with two of us. The windows and vent are from Vintage Technologies that sells parts for teardrop trailers. Cutting into the van was a little scary, but once everything was all put back together it was well worth the trouble. The windows make a huge difference! Since I had to make panels to help mount the windows, we also started insulating the ceiling and panels. It's one layer of self-adhesive duct insulation which a lot of people use as a cheaper alternative to Dynamat, and then a layer of Reflectix where space allowed. The next step is to start doing finish work and making things look neat. Phase 4 Photos The point of no return. The lines look a little sketchy in this shot, it took a couple tries with one of the corner to perfectly match the template. Holes Cut! The blue tape made marking the cuts much easier and kept the paint from getting scratched. Windows In Interior window shot. The windows open and have screens in them. Hole cut for side window. I didn't realize until I started cutting that the panels on the side are plastic rather than metal. Window #3 in! The angle of the body panels give a weird optical illusion in this shot. The window is flat against the van. I swear! Battens glued to the ceiling Frost King duct insulation on the ceiling Step 1: Self-adhesive duct insulation Step 2: A layer of Reflectix, glued in place Step 3: Wooden Panel Ceiling vent framed in. The Reflectix is glued in, the tape is just there to keep it in place as the glue dried. Ceiling vent installed with bead-board Hard at work installing Reflectix Bonus "Work Shop" Shot. This is where I've done all of the work so Far. Also, Jake the Dog. Put back together! Ceiling vent. Not crazy protrusive! -
Micro Camper Conversion 2015 LWB XL
Torton replied to Torton's topic in Accessories and Modifications
Phase 3: Upholstery and Doors Here's the third album of progress on the Transit Connect Camper. It might not look like much, but the functional refinements make a huge difference! The photo included in this post is a couple buddies having some cold drinks under the awning after a mountain bike ride. I took the van to Kentucky for it's maiden voyage in June and the trip went really well. The only piece that was super annoying was having to lift the seat in the back to access the large storage area under the "couch". I didn't expect for it to be as big of a deal as it was. I added a couple doors to make accessing the storage area easier. The bed was one of the best parts of the van, it's just barely narrower than a full bed and is full length. The Ikea mattress proved to be much more comfy than I had expected! The cooking drawer also proved to be as functional as I could have hoped. Having the 7 gallons of water in the van was great, since hiking in 90 degree weather left me dusty and thirsty. I also added the ARB awning, which is probably my favorite piece of the build so far especially since I'm a ginger and have trouble being out in the sun. Phase 3 Photos Here's a photo with the "couch" without the doors on the bench. In order to access the storage area you had to lift up the seat. During my first multi-day trip with the van, I found that this was way more of a pain than I had expected it to be, especially when having to do things like change or cook where you have to enter the storage area many times in a row. Also, even with the current set up, we can still fit two bikes inside the van without putting them on the cushions. I added 3 doors to give easier access. Cutting huge holes in the bench was a little nerve-racking, but it is so much better than constantly lifting the bench top. The cabinets are sized so that our folding chairs and table can fit in the back portion of the cabinet. Now we'll be able to slide them in and out of the back door. The bed folded down. The entire back of the van becomes the bed, which is about 2 inches narrower than a full size bed and full length. This is before adding the cabinet doors, which will allow access to the under-bed storage that wasn't possible before when the bed was folded down. Bonus cooking set-up photo. -
Micro Camper Conversion 2015 LWB XL
Torton replied to Torton's topic in Accessories and Modifications
So, I seem to be having trouble putting photos in the forum using anything other than uploading them individually. Is there a secret way to use embed codes that I'm missing? Phase 2: The Kitchen and Bed Either way, heres the second part of my Transit Connect camper conversion. In this part, I've finished putting together the boxes that will serve as storage and the kitchen for our camper. The idea is to have something that is not as much about living inside of, but a motivator and facilitator to make being/going outside easier and more convenient. We'll be using this to take our honeymoon this fall. The boxes are built out of baltic birch plywood, which I would highly recommend. The stuff is really great to work with and is super stable and sturdy. I've used hand planes to flatten and trim edges, which wouldn't work nearly as well with standard plywood. The mattress is from Ikea and the water tank and stove are standard things you can find at camping stores. Stove: Camp Chef Everest. Water Tank: Reliance 4 gallon Aqua-Tainer Part 2 Photos The drawer had to be built around two pieces: This water tank and the stove. I built the frame of the drawer first. The drawer is supported by 36" 500lb capacity slides. The slides were one of the most expensive pieces of this project so far. Building the shelves to support the stove. There's around an eighth of an inch of clearance above the water jug. These were some tight tolerances for me! The top shelf is there to raise the stove higher for a more natural cooking position. The stove slides into the space in between the top and little compartment. The shelf sits on this little compartment where utensils and such will go. I might make this area a little taller to accommodate more pots and pans. The full bed from ikea almost fit without having to trim the width. the bed dimensions are 49"x74" The bed trimmed to fit. I built temporary legs to support the bed. These will be replaced with something a little more sleek later on. The foam was cut with a super cheap bread knife. Note: The foam attracts animal hair like a magnet, so once the cover is off keep it away from pets! Laying out the lines for the foam sections. This was where my first set of cuts was. The rest were much more neat. I tried a couple different knives before I settled on the bread knife. Mattress Cut to Width. The "couch" in place. I didn't realize how funny the "couch" would look, but that's the price I pay for having a full size mattress in the van. Here's the slide out drawer coming out of the van. The stove on its platform with cubby open. The stove open and ready for cooking -
Micro Camper Conversion 2015 LWB XL
Torton replied to Torton's topic in Accessories and Modifications
Thanks for the kind words! I definitely considered the earlier generation, but both my wife and myself are pretty tall so the extra length was our priority. Now that I've got cushions and a ceiling in, I wish I had the extra height, but still think being able to stretch out on the bed is worth it. -
T0ASTERvan started following Torton
-
Transit Connect Camper Conversion: Part 1
Torton added images to a gallery album in Ford Transit Forum Member Albums
-
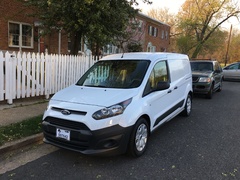
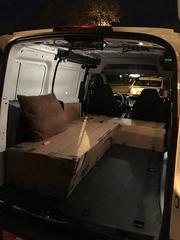
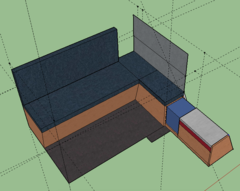
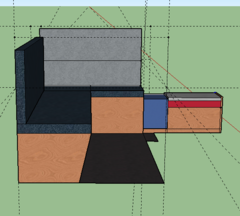
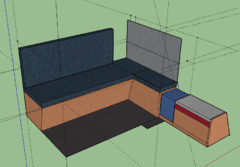
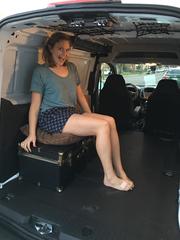
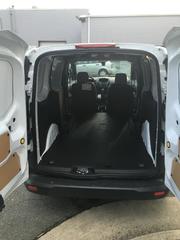
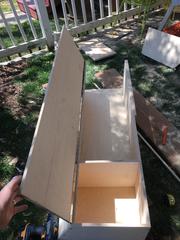
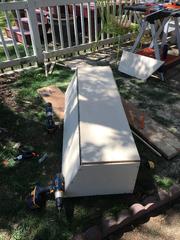
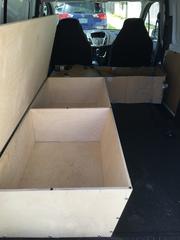
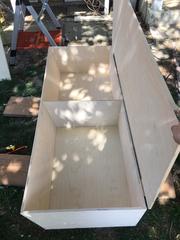
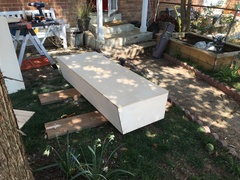
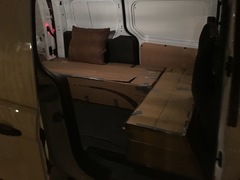
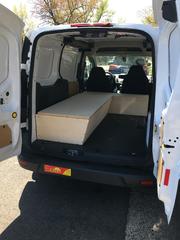
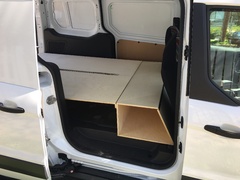
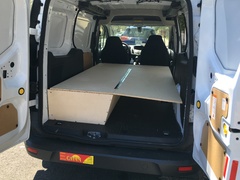
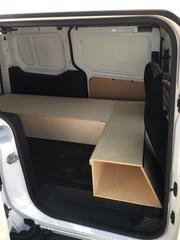
Hello Folks, I've been building out my 2015 van into a micro camper for the past few months. I've been sharing the story on reddit, but I figured I should post here as well especially since I used resources I found on this site to influence my build. I have a ton of photos I've posted and taken. I'll start adding them here. So far, I've posted 4 different "phases of the project. So I'll make one post per phase to share what I've done so far. Phase 1: Here is the start of the conversion of our Transit Connect into a weekend getaway camper. It's a 2015 model with the long wheel base, which adds around 1 foot of extra cargo length. The boxes are built with baltic birch. Using this wood helps keep the weight down by not having to add much extra support beyond the plywood itself. I "designed" the layout in Google Sketchup (it was the first time I had ever used a 3d modeling software) and then built templates out of cardboard. After that, I started building the boxes. Link to the album. 2015 Transit Connect - Long Wheel Base Cargo Area - Roughly 7'x4' Making Sure We'll Have Enough Head Room on the "Couch" Sketch-Up Drawing of the layout The Blue Box is the Water Container and The Red is Our Stove The "Kitchen" will be a drawer that slides 36" out from the side door. Cardboard Models Starting to Build the Boxes Interior of Box 1 Box 1 in the Van - 60in Long Box 2 The open end is where the drawer will slide out from. I'm going to add more supports on that side once the drawer is installed. Boxes in the Van The bed folds across from the couch. I still need to design the rear supports Front View of the Bed Bed panel folded onto the couch.
