-
Posts
52 -
Joined
-
Last visited
-
Days Won
2
Paul Hauser last won the day on March 8 2016
Paul Hauser had the most liked content!
About Paul Hauser

Profile Information
-
Region
U.S. Mississippi Valley
Recent Profile Visitors
-
Paul Hauser changed their profile photo
-
 mrtn reacted to a post in a topic:
Installing 2DIN nav in '15 Gen2 with Mechless radio
-
Its been a little while since I did this install but I took photos and planned to write about it when the weather was nasty. today the weather is nasty. I have a '15 Transit connect LX cargo van with the very base package. I bought this model believing that it would be a great platform to build whatever I wanted. That's been true some of the time, but the very basic model has significant differences in the wiring harness and in fact some of the harness simply isn't there going to the cargo area. The "mechless" radio is a big difference. Mechless radios have only AM/FM, no CD player. There was no 4" screen above my radio and no steering wheel controls. Researching on the Crutchfield website said there were no radio install kits for my vehicle, I knew I could fab something, but that wasn't the only problem I would run into. Since I had no 4" screen and the install kit had no provision for not having one I decided to install a switch panel in that spot. I started with paper mach-up, then made one from Plexiglass. Why Plexiglass? I had some, and its easy to fab since you can see through it. Here's new and old next to each other. When you pull out the Mechless radio there's a big hunk of useless plastic. remove it. Now there's plenty of room. Before any of you comment, my van is filthy. It will remain filthy through out these photos and probably throughout its existence. I had to pull out the seat to run the wires for the backup camera under the floor matt, as well as pull the canter console and trim around the shifter. What a mess. The Nav and XM antennas tuck in nicely under the little visor piece. and I added a USB port that goes to USB2 on the radio for Android Auto. This is a convenient spot to plug in but very inconvenient when taking things apart, I would rethink this if I were doing it again. After getting all the wiring and hardware complete, with much excitement, I switched the power on..... and nothing happened. just a blank screen. talk about a sinking feeling. after a few phone calls that I should have made when I started this project I found that I had used the wrong wiring harness from Metra. While most of you will use the XSVI-5524-NAV CAN data interface, those of us with mechless radios need the simpler 70-5524. Even though I do have a CAN system in my van, the radio doesn't use it and the wires aren't there. The only thing that I don't have in the end is the speed signal. I think I could find it under the instrument panel, but I haven't tried so far. It works fine without it. final project working. so what do the switches do? on of them works these cargo area LED strips. I hope this has been helpful and inspires you to do your own custom install.
-
 gargman reacted to a post in a topic:
Hole in the floor (but in a good? way)
-

bike haulers; what fits how.
Paul Hauser replied to Paul Hauser's topic in Cargo, Hauling, Towing & Upfit Packages
Triumph? Maybe Norton? What is it? -
 mustang reacted to a post in a topic:
bike haulers; what fits how.
-

bike haulers; what fits how.
Paul Hauser replied to Paul Hauser's topic in Cargo, Hauling, Towing & Upfit Packages
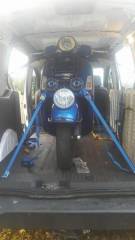
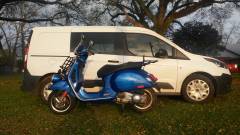
Here's my Vespa GTS300ie -
It seems like several of us are interested in hauling our bicycles, scooters, and/or motorcycles. Lets see 'em.
-
Paul Hauser started following install 4 , inside , outside and 7 others
-
-

Hole in the floor (but in a good? way)
Paul Hauser replied to Paul Hauser's topic in Accessories and Modifications
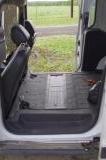
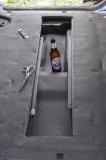
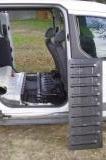
The sub-floor is very uneven so its not a simple measurement but the drivers side is roughly 6.5" deep and the passengers side is more like 8.5". The center is very shallow. there is also space forward of my hatch. If you wanted to keep any small parts in this space there are some cutouts in the rubber mat that would need to be sealed in some way. -
 LostInTransit reacted to a post in a topic:
Hole in the floor (but in a good? way)
-
 LostInTransit reacted to a post in a topic:
Hole in the floor (but in a good? way)
-
 LostInTransit reacted to a post in a topic:
Hole in the floor (but in a good? way)
-
 LostInTransit reacted to a post in a topic:
Hole in the floor (but in a good? way)
-

Hole in the floor (but in a good? way)
Paul Hauser replied to Paul Hauser's topic in Accessories and Modifications
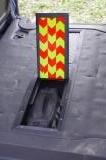
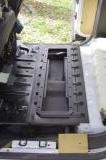
Then for the install Bolted in Mat cut out, this was myu last chance to call it all off. Trim installed. I fairly happy with the way the trim looks but know sooner or later something will catch on the corners, they stick up just enough to snag something. Any suggestions? The door was dropped into place and secured with the knob beneath. Its a little snug but I think it will loosen up with a little use. If it doesn't I'll have to take it out and sand it a little. I put reflective tape on the bottom of the hatch. It could be removed and used as a warning signal while changing a tire or other roadside emergency. -

Hole in the floor (but in a good? way)
Paul Hauser replied to Paul Hauser's topic in Accessories and Modifications
Trim was measured out and holes were drilled and tapped to attach it. I used carpet trim from a home store, the holes were already in the trim so I matched the spacing, this turned into a problem later. Because I made the framed out opening as large as I could I need to drill holes to reach the bolts that hold the down. Unfortunately some of these holes lined up with the trim holes. I decided that 16 bolts was overkill anyway and opted to only use 14. The opening for the hatch was marked out on the deck and cut out with a angle grinder. The bolts that attach the deck to the supports in the van are captive now. Small (crappy) welds join the OEM deck plate to the new hatch frame. -

Hole in the floor (but in a good? way)
Paul Hauser replied to Paul Hauser's topic in Accessories and Modifications
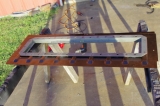
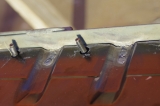
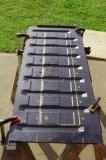
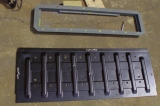
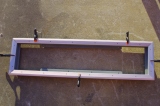
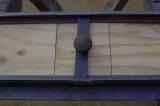
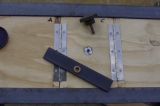
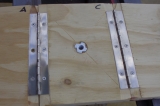
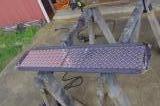
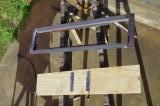
To start the fabrication I figured the biggest hatch that would fit and welded up a frame. I decided to go with a 3 segment hinged lid that could be accessed from either side or removed entirely. I built the door out of scrap plywood and covered it with aluminum diamondplate. This little fastener is called a Tee nut, they're used in a lot of furniture. A recycled knob and a piece of flat stock would hold the door in place securely but allow it to be removed without much fuss. I drilled a shallow hole in the wood and punched a smaller hole in the metal to make a finger hole to open the hatch. Everything would be painted black in the end. -
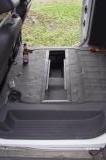
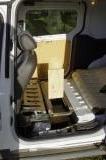
Preface: I'll break this up into a few posts. I apologize for the small photos. There has been some discussion of the void below the floor in the Gen2 cargo vans, I decided to do something with the space. Several lessons were learned, I would do some things different if I were to do it again, but I'm happy enough that I'm not doing it again. Here's what I did. First I did a little exploration. Removed the door wells Peel back the Mat and pulled out the deck piece
-

My Switched Auxiliary Power Circuits
Paul Hauser replied to Paul Hauser's topic in Accessories and Modifications
I finally installed the 12v sockets that are permanent. one on each side as far forward as possible. -
A seatcover might cover any hole left by removing the armrest.
-

Stereo Upgrade Ford Transit Base to DDIN Carplay
Paul Hauser replied to Jon11a's topic in Audio, Navigation and SYNC
Before you buy anything be sure whether or not you have steering wheel controls. My XL (base model) only has the cruise control, not the stereo controls. -

Storage Under the LWB's Load Floor Extension?
Paul Hauser replied to SteveMalone189's topic in Interior
Some are welded (like the one in the photos above) but mine is bolted. I have a project in mind for mine. You'll have to peel back the carpet and look. -
 Slonie reacted to a post in a topic:
My Switched Auxiliary Power Circuits
-

My Switched Auxiliary Power Circuits
Paul Hauser replied to Paul Hauser's topic in Accessories and Modifications
The ring connectors were 5/16. Getting that nut off and back on was one of the hardest part of this project, I unsnapped the plastic housing so I could pry it back a little. I'm not looking forward to replacing that battery. :( It seemed like the best place but I don't know if I'll be able to add much more there. You could put two of those Delphi 6 way connectors back to back and use a common bar and jumper wires. I just soldered wires together to break out the power. Let us know if you have any luck removing usable parts from the salvaged fuse block. That was my initial thought but I was to cheap to get on one Ebay not knowing if Id be able to use it.

