RDinNHandAZ
T.C. Member-
Posts
22 -
Joined
-
Last visited
-
Days Won
1
RDinNHandAZ last won the day on November 1 2024
RDinNHandAZ had the most liked content!
About RDinNHandAZ

Profile Information
-
Region
U.S. Northeast
Previous Fields
-
My. T.C.'s Year
2010
Recent Profile Visitors
24,181 profile views
-
I went in for inspection of my 2010 TC XLT and while up on the lift I noticed the bottom plate of the front subframe was rusted very thin with some holes. I got the sticker but with advice to start looking for a used subframe from a non-salted van. I just bought one on eBay for $360 shipped from Virginia. Now for the Help! part. Google-fu doesnt show a uToob video of the replacement process. Anyone know of help for me to know the pitfalls or willing to give helpful advice? I’ll work with my Independent mechanic but he’s never done one on this van. I need help.
-
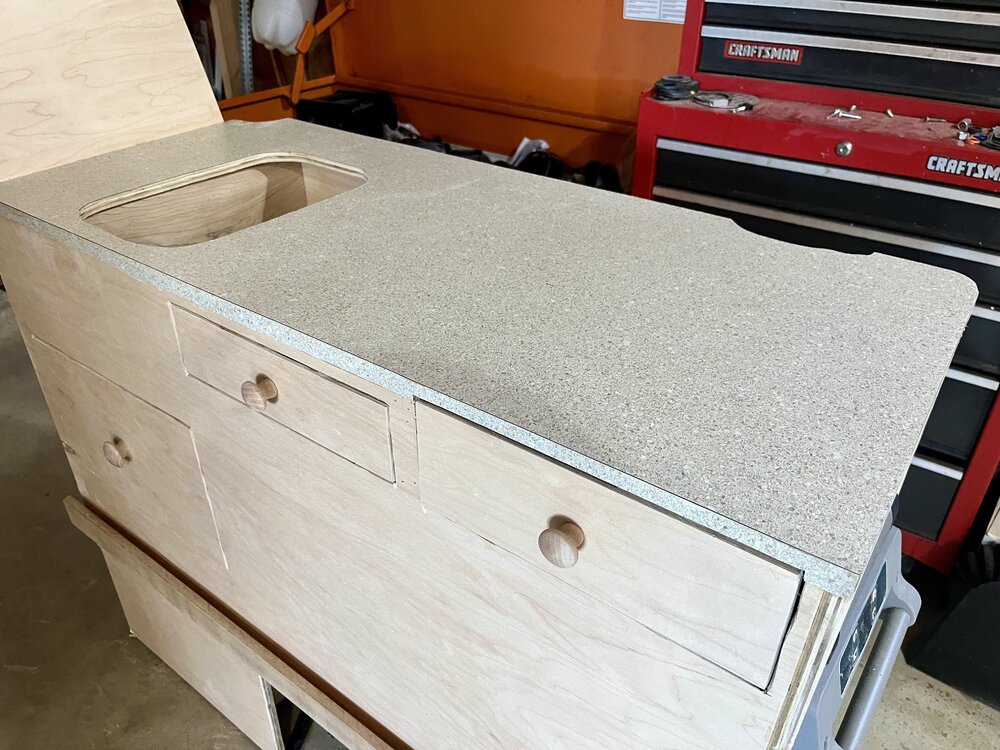
I’m in the lakes region and still finishing my older van. Message me if you want feedback on your plans or to see mine. I just installed the formica on my galley and once it’s polyurathaned it gets the final install. I’m close to building out the electrical system and installing the roof vent.
Good luck on your van build.
-
Yup they are, and the weep holes along the door's bottom edge is where the melted frost and water escapr from.
-
Intro + mystery circular cargo plates in 2012 wagon
RDinNHandAZ replied to StephenC's topic in Welcome!
I can’t help much but have them too except I dont have the plugs. Mine have just a metal cup with no top at all. I’d say pop the cap and fillt or cover them smoothly.- 1 reply
-
- 2012
- cargo area floor removal
-
(and 1 more)
Tagged with:
-
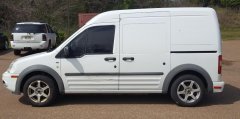
I found a 2010 TC near me in NH and after a bit of rust abatement and driving it for a few months decided to build myself a camper. It had less than 60K miles, good tires, smooth running but some surface rust on the rear bumper cover and pinch seams on the rockers. I replaced the bumper, repaired the spare bracket, bought a wheel to replace the spare and shot an oil based rustproofing on the rockers. Inspection found corrision on one side of the front suspension subframe that I had welded. The van wasnt generally very rusty but these places are commonly the first affected. Convinced this could make a great camper for my fur pal Jack and me I designed one. It needed a single bed, a galley, storage, some electricity for a vent, heater, lights, and for electronics recharging. To start I pulled out the back seats and insulated enough so that a 2KW diesel heater could overcome freezing temps in case I camped in late fall or early spring. I’ll have a powered roof vent for summer and for cooking. The insulation is covered with a felt carpet to improve the appearance. For a bed I used 1/2” hardwood plywood and slats from Ikea to make a cot sized main bed and added two pullout sections to bring it to twin size. It is firmly bolted to the van. I found a 4 piece folding twin sized mattress on Walmart which I cut appart and then sewed the open sides back closed. I also added a shelf above the drivers cabin to store supplies and clothes. The narrow cushions are used as backrests when the bed is compacted to twin size and makes a couch for sitting. Old milk crates fit under the bed for storing shoes, hiling boots, butane fuel and much more. To support the pullout I built a galley with a sink, drawers, and a slide out for my trusty refrigerator. When installed and bolted in it gives some food storage, a place for 2.5 gal. water jugs for fresh/waste, and my cooking stove plus utensils. I'll add a CO2/Smoke detector and fire extinguisher. It will get a formica top soon. I’ve purchased most of the equipment to finish the electrical with a 100Ah LiFePO4 battery, 200 Watts of solat panels w/controller, some fuse and distribution panels, puck lights, usb and cigar outlets for charging, and swirches. I hope to finish this in a couple of months so I can get away for a shakedown trip before fall. At this time I’ve spent just under $5,900 including $4,700 for the van, and about $1,200 for the conversion. I will probably find a few more items that are needed but my goal is to keep the cost at $6,000. The van will get a transmission service, fluids changed, new belts and perhaps radiator hoses before I go far. With only 6,000 miles it may not need all that but it is now 15 years old. I hope to see you on the road!
-
 RDinNHandAZ reacted to a post in a topic:
sound deadening
-
I hear ya. Well now I can hear you! I bought a 2010 TC last spring to convert to a one man camper and I was surprised at how loud it was and how much road noise it generated. I too added some sound insulation, some polyisocanurate ridgid board, glass fiber, some Reflexix and carpet as both sound proffing and insulation. I built a slide-out bed and cabinet galley as many others have done. All this helped and when I purchase new tires I’ll look for some who's feature list is quietness. I didn’t do anything to the roof as it had the liner already. I also went with lighter gray color and maple plywood to build the cabinets to keep it light inside. I wish I had recorded the improvement with the decibel app on my iPhone.
-
I didn't on this van but did use it “Gaps and Cracks” to glue in some polyisocyanurate panels where the walls were flat enough like the rear window spaces. I've done it before on a previous van and if you do BE VERY CAREFUL not to fill the space as the foams expands with force and will deform the outside skin of the van. I’d stuff them with a hydrophobic fiber like glass fiber, or thinsulate if you are rich.
-
I’ve done a couple of vans and I think the thinsulite will be so close to what it and the kilmat together would do you wouldn’t be able to tell the difference. However after spending the money on some Kilmat you probably would say it was quieter just to believe you spent the money well. Your phone should be able to get an app that is a decibel meter to record how well it works. Much of the noise often comes from the front and rear wheel wells so if you can improve them their you will gain a lot. On my previous van I used a heavy layer of ruberized spray undercoat to good effect inside the wheel wells and this one I boxed the rears with insulation between the box and tin. My TC 2010 has reflexix on all the walls covered with thin carpet. That helps a lot.
-
Probably a bad battery, poor battery connections, poor ground connection, or defective relay in order of likeliness high to low. Does the ticking happen with the key off or only with it on or attempting to start? What you can do: Attach a battery charger and let it run for hours monitoring that it shows current going into the battery. If the van then will start suspect a bad battery. Go to an auto parts store and have the battery tested instead if that is easier. Good luck let us know.
-
Those seem like “normal” maintenance except the right rear brake adjuster and the transmission changes are a bit more often than I was thinking. Since it has worked for you I’ll go to your schedule for that. Thanks
-
 RDinNHandAZ reacted to a post in a topic:
hit 560K miles
-
Since you bought it used with lots of miles I expect it was inexpensively priced. Now you’ve driven it another 240,000 miles and hopefully it’s going strong and your repairs have been reasonable. I’d guess this van has been the most inexpensive vehicle per mile anyone could manage to own! I recently bought a 2010 with 59,000 miles I am converting to a one-traveler camper. I paid $4700 and will have $6,000 in it ready to hit the road for 4-5 months at a time.
-
 Humphrey's Van reacted to a post in a topic:
Shift linkage bushing failure
-
BUMP. I know there are members who know the answers to some of my questions. Help please.
-
My cluster lights do not dim when the small wheel on the light control panel is turned. They are too bright. At the end of the movement there seems to be a detent that does nothing too. I got a preowned replacement from Ebay and it acts the same. How should this work? Are both these switches bad? Should I pony up the $100 for a new one? Would the switch that has the fog light control in it work too( it is $55 new)? Thanks to those who know how it is supposed to work and can make me smarter.
-
 RDinNHandAZ reacted to a post in a topic:
2003 Connect Spare Wheel Wont Wind Down
-
Shift linkage bushing failure
RDinNHandAZ replied to jcb0410's topic in 2002-2013 Ford Transit Connect
Sorry I don’t but I have made/modified many bushings over the years. I measure the ID requirement with a caliper, then the most important OD of the current one or from the holder, and the length. Then I decide what material might work like nylon or bronze and try for a near match at Tractor Supply or Granger. Get the correct OD then either drill or ream it, cut it to length and instal it. Not a simple solution but it has worked many times for me. You could try these guys: https://www.bushingfix.com/ford-transit-connect-shifter-linkage-cable-bushing-replacement-kit/ Or: https://www.ebay.com/itm/335365257942?chn=ps&mkevt=1&mkcid=28


